I. Creating an account on GitHub
First, go to the GitHub web page:
Fill in your name, email and choose a password:

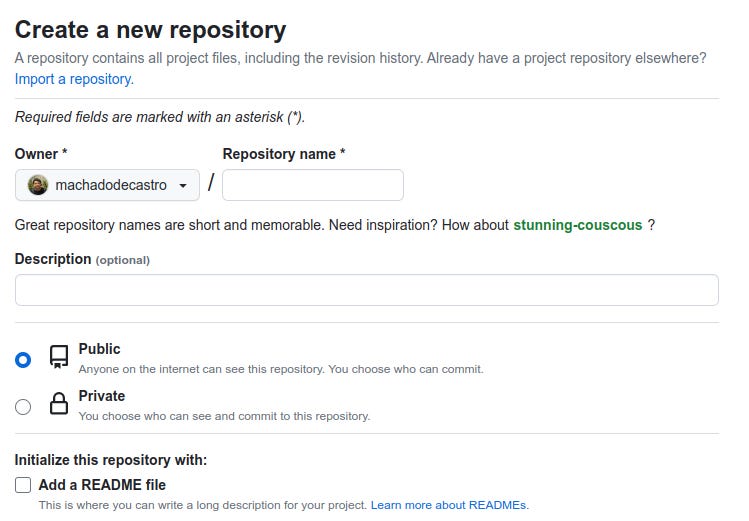
Now we can create a remote repository, which will be available to everyone on the Internet. To do so, click on the New Repository button after accessing https://github.com :

In Repository name, we must fill in the name of the repository remote. In our case, let's fill it with "musics". Let it repository as Public, so anyone can see your code. The other options can be left with the default values. Now we can click on Create Repository button:

II. Pointing your project to GitHub
Very good. We have the repository created on GitHub and the project in the computer directory. But they are disconnected from each other. We need to point our directory to GitHub and make them linked.
In a terminal, make sure you are in the directory which has the local repository:
$ cd ~/songs
Then, run the git remote command, as below:
$ git remote add origin https://github.com/xyz/songs.git
Be sure to change xyz to your username GitHub. No message should appear now.
With the previous command, we point the origin name to the repository there on GitHub. Now they are connected.
III. Pushing changes to GitHub
With the repository set up and linked to our local directory, we can push changes to GitHub. To do this, just run the command:
$ git push origin master
With the previous command, we send the changes to the remote repository configured with name origin .
Go to your project page on GitHub and you will see your file there:

